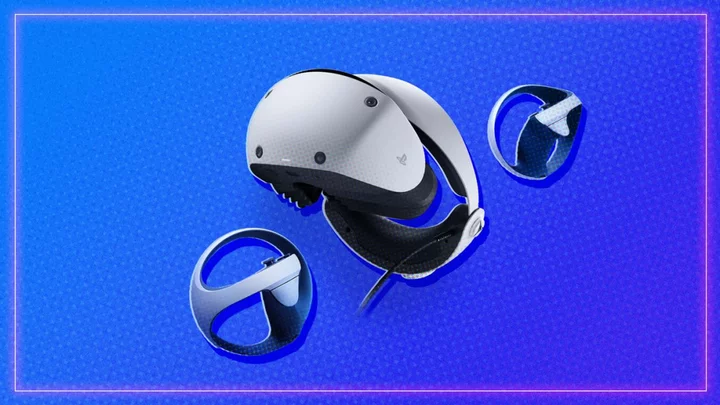
The PlayStation VR 2 is PCMag Editors' Choice winner for virtual reality headsets. Its high-resolution OLED display, advanced haptic feedback, and improved tracking technology make it a must-buy for PS5 owners interested in VR.
But while connecting and setting up the PlayStation VR2 is much simpler and easier than the first PS VR, there are a few settings you'll want to optimize to experience the full potential of this cutting-edge headset. This guide will show you how to adjust the fit, customize buttons, find your controllers using see-through view mode, and more.
1. Get a Good Fit
The PlayStation VR 2 headset is adjustable and designed to work with a range of head sizes and shapes. Getting the right fit is essential for maximum comfort and immersion, and can make a significant difference in your overall VR experience. If the screen resolution on your headset is blurry, for example, try adjusting the fit.
Adjust the headband: Start by loosening the band, then put the headset on and adjust the headband until the front of the headset sits comfortably on your forehead. Tighten the band with the dial on the back until it feels snug but not too tight.
Ensure the headset is level: The PS VR2 should sit level on your head, with the front of the headset at the same height as your eyes.
If you need extra assistance, the PS VR2 offers a built-in explainer. Navigate from the home screen and click Accessories > PlayStation VR 2 > PS VR2 Settings > Check How to Put on VR Headset.
2. Upgrade to VR
Resident Evil Village VR ModeOne of the great things about the PS VR2 is that it can enhance certain PlayStation titles by allowing you to upgrade to a VR version of the game. Popular games such as Resident Evil Village and Gran Turismo 7 have been updated to include VR support, and if you already own these games, you can upgrade them to the VR version at a discount (some upgrades are free).
It's important to note that if you have games from the original PS VR, they will not work on the PS VR2. However, some PS VR games are available for a free upgrade to the PS VR2 version. Check if any of your games are available for an upgrade via Games > Game Library > Your Collection, then view the product page to see if it has an upgrade. If the game is compatible, you can then purchase the VR upgrade from the PlayStation Store (or in-game, if available).
3. Adjust the Lenses
The PS VR2 headset features two lenses that can be adjusted to match the distance between your eyes and improve the clarity of the image. Open Accessories > PlayStation VR 2 > PS VR2 settings and select Adjust Lens Distance and VR Headset Position. Use the dial on the bottom of the headset to move them closer or farther apart until you see a clear image. This can be done without accessing the settings page, but that page will walk you through the process with on-screen visuals that show you when the lenses are in the right place.
4. Recalibrate Eye Tracking
You may also need to recalibrate the headset's eye-tracking feature if you experience any accuracy issues while playing—especially if you share the headset with someone else. To adjust the eye tracking, open to Accessories > PlayStation VR 2 > PS VR2 settings > Adjust Eye Tracking. Note this option is only available when Enable Eye Tracking is toggled on.
5. Customize the Function Button
The PS VR2 features a Function button located on the bottom right of the headset that can be customized to suit your preferences. Open Accessories > PlayStation VR2 > PS VR2 Settings > Function Button Assignment. Select what the function button does when pressed, such as muting your microphone or viewing your surroundings. The latter gives you a quick view of the real world around you without having to take off the headset, for example.
6. Reset Your Play Area
At times, you may have to reset the physical space around you, known as a play area, if you change where your gaming sessions take place. PS VR2 will prompt you to reset your play area if it detects a change in your physical space, though you can also adjust it on your own.
Open Accessories > PlayStation VR 2 > PS VR2 settings > Set Play Area. Follow the on-screen instructions to recalibrate your headset and controllers to ensure your view is centered and movements are accurately tracked.
7. Re-Center Your View
VR games will often prompt you to re-center your view to ensure your head is in the best position to play the game. However, if you're using the VR headset while playing a non-VR game, navigating system settings, or watching a movie on Netflix, you can manually re-center your view if you change your position. Just face the new desired direction and hold the Options button on the Sense Controller, which is located on the right controller (labeled H in the image above).
8. Expand the Screen Size in Cinematic Mode
Any time you plug the headset into your PlayStation 5, you can view the screen through the lenses to play non-VR games or watch Netflix. Regular games won’t suddenly be enhanced with VR, but the headset can still provide a more immersive experience.
Better yet, when you use the headset this way, you can expand the screen size so it feels like you're in the front row at the movie theater. You just won't have to crane your neck back to see the screen. To do this, go to the home screen, then select Accessories > PlayStation VR2 > PS VR2 Settings and use the Screen Size slider bar to make it as big or as small as you want.
9. Use Your Own Headphones
The PS VR2 comes with its own in-ear headphones and built-in microphone, but you may prefer to use your own headphones for better audio quality. Wireless earbuds can be added through Bluetooth, while wired headphones must be plugged into the 3.5mm audio jack on the underside of the band that goes around your head. Just unplug the PlayStation VR2 headphones and plug in your own. (If you have over-ear headphones, they'll work, but it's going to be a bit clunky to wear with a VR headset.)
If you run into audio issues while using your own headphones, make sure the headset settings show the correct audio output. While wearing the headset, open the PS5 settings and go to Sound > Audio Output > Output Device, then select your headset from the list.
10. Save Controller Battery Life
The PS VR2's Sense Controllers are designed to turn off automatically when not in use, but you can turn them off manually, too. Open to Accessories > PR VR2 Sense Controller and select Turn Off. Make sure to do this for each controller.
In my experience, the VR controllers drain faster than the PS5's DualSense controller, especially when they are left sitting unused for a day or two. Turning them off after use can help ensure they will have some life left in them when you are ready to play again.
Another option is to physically plug your Sense Controllers into your PS5 console, though you may quickly run out of ports if you have the VR headset, DualSense, a gaming headset, and two Sense Controllers plugged in.
A better alternative may be be invest in a charging station for the controllers. Sony offers its own charging station, but many third-party vendors offer their own models. The station plugs into your console, and you place your controllers in the station after each use to get a charge.